Installation :
Load the zip file directly from the backoffice of PrestaShop, « modules> add a module » tab.
Configuration :
After installing the module form invites you to learn typography and a color palette. This data will be used by the visual text editor.
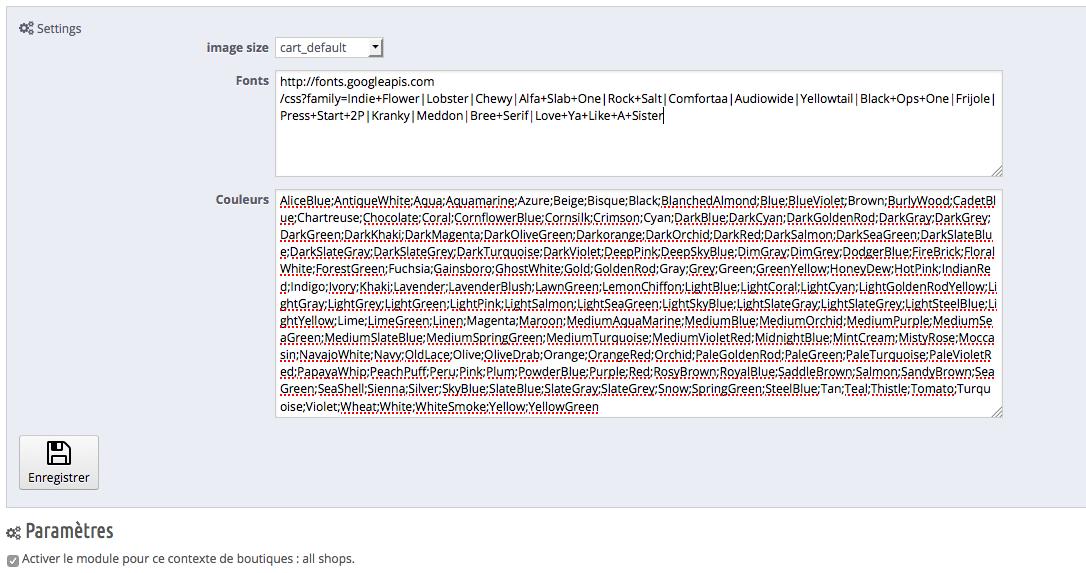
1 . Font colors :
To add colors, simply list your colors in the fields separated by a;
You can insert named web colors, hexadecimal or rgb formats (AliceBlue; # F007C; rgb (233, 210, 123);)
2. Fonts
In order to simplify the insertion of typography and its compatibility with browsers, you can integrate a selection of Google Font typography into the module.
To do so, visit https://www.google.com/fonts/
Select the typefaces of your choice by clicking on the blue « add to collection » button.
Once you have made your selection, click on the « use » button at the bottom right of your screen.
In section 3, you will find a section called « 3. Add this code to your website « .
then copy the part between quotation marks after the href as in this example: (in green the part to copy)
<link href = ‘https: //fonts.googleapis.com/css slabo + family = 27px’ rel = « stylesheet » type = ‘text / css’>
Do not forget to save your configuration!
3. pre-defined configurations
You can offer pre-defined configurations to guide your customers. To do this, activate the option, then while being connected to your shop administration, go on your product in front office. Create your configuration and save it using the form provided.
4. Client configurations
You can also allow your connected clients to save their settings for later retrieval.
a registration form will then be proposed to your customers.
Returns on your products, the module will propose them to load their old configurations.
Don’t forget to save your configuration!
Fields :
In this section we will detail the different types of fields and their functionalities.
Generality :
All field types have different configurations.
In general, fields can have a visual effect on the image of the product. For example, for a text field, you can choose to display the text entered by the user directly on the product to get a preview. The same applies to an image or color field that may or may not have an immediate visual effect.
To do this, simply check yes for the « Visual effect » zone
In the same way, fields with visual effect can be modified or not (resized, rotation, color…).
To do this, simply check yes for the « Configurator » box.
You have the possibility to add a surcharge for each field, this one must be reseigné duty free.
If you prefer to manage the surcharge by value, leave this field at 0.
Each field can be assigned to one or more products.
Use the product search field to select the products that will be affected by this field.
Alternatively, you can assign this field to one or more product categories.
Use either one or the other to better control your organization.
Each field is composed of values (except the text field).
After creating your field, click on the display button to see a list of its values.
You can add as much value as you want.
You will be able to define in each list of values which will be the default value if you want it to be applied to the page loading.
You will also have the possibility to interact the fields with the « influence » functionality.
the influence works as follows:
take the example of 2 fields named A and B.
Field A can be told to influence field B, so that for each value in field A it will be possible to choose which value (s) in field B will be disabled.
Ex:
A1 disables B1 and B3
A2 disables B2, B3 and B4…
Note that one field can influence several fields.
Fields A and B and their values must be created beforehand
Text field or textarea :
The text field will allow you to add a free text field to customize your products.
Text fields and text boxes have the same options
You can either add a simple field or a visual field.
You can specify the maximum number of characters and the number of text lines allowed.
If the visual effect is activated, the user can choose the typography and color of the text.
You have the option of specifying:
The colors available as hexadecimal colors, separated by a; (#ffffff; #cccccccccccccc; #00000000; #EEEEEEEEEE…).
sizes in px separated by one; (20;30;40;50…).
typographies by filling in a google link are different from the general configuration.
The effects by selecting the desired available effects.
You can also modify the placeholder of the field (name registered by default in the field). To do this, add values to the field (if your multi-line field, add as many values as lines.
In the value, the value will then be the field label.
In this same form, you will be able to add a mask to the text field to force its formatting. In the mask text field enter the desired mask.
example: 00/00/0000 (for a date), 00:00:00 (for an hour), 00:00,00 kg for a weight, AAAA (for a field that accepts only 4 alphabetical characters), 0# (only digits will be accepted), A# (only letters will be accepted).
Select field :
The select field is a single body which will then allow you to offer various options to your customer with a cost or not.
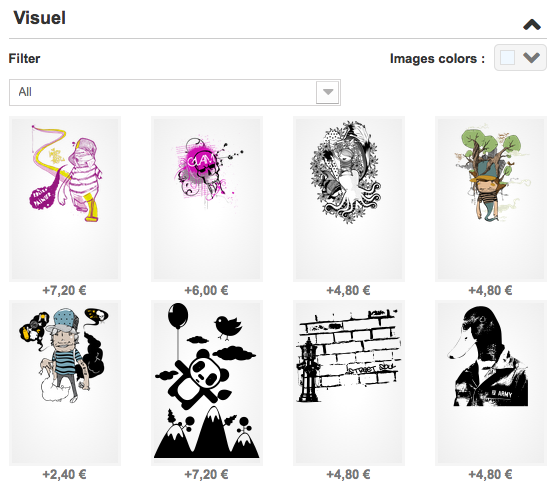
Image field :
The image field allows you to propose options in an illustrated way.
It also allows you to apply a visual or visual effect on the product and also to apply the configurator (image position, rotation…).
If you send a visual in svg format, it can be colored. (practical to colorize a precise shape without having to generate all the images)
You can then define the available colors as for the text field, or keep the general configuration.
As in Photoshop® for example, you will be able to choose the transparency mode of this color (whether it is an image or a square of color generated by the module): normal, superimposed, brighten, darken, color, hue, saturation.
You can also add tags to your images to allow users to filter it according to these tags.
Color field :
This field works exactly like the image field.
The difference is that on the front-office side, instead of displaying a list of images, colour squares will be proposed.
As in Photoshop® for example, you will be able to choose the transparency mode of this color (whether it is an image or a square of color generated by the module): normal, superimposed, brighten, darken, color, hue, saturation.
These transparency effects can be useful if you don’t want to produce images of each of your colors.
You define the color from the value creation form.
Full Designer field :
This field combines the features of text, text, image and upload fields.
It will allow your customers to add as many text fields, text boxes and images as they want.
As in Photoshop® for example, you will be able to choose the transparency mode of this color (whether it is an image or a square of color generated by the module): normal, superimposed, brighten, darken, color, hue, saturation.
Accessory field :
The accessory field allows you to propose accessories for your products. For each accessory you can specify the name, picture, description, price, minimum quantity, maximum quantity.
Each option will then propose to your customers a quantity field allowing them to add several quantities of each accessory.
Product accessory field :
This field works in the same way as your accessory field except that for each value, you select a product from your catalog. The module will generate a product pack on demand, ensuring the synchronization of your stocks.
For each value, you will be able to overload the price (if it is not indicated, the price of the product will be applied).
The module will also allow your customers to select the desired product range and quantity, thus calculating the price according to these parameters.
Warning: if the price is overloaded, it will overcharge the price of any product version.
Combination tab field :
its principle is the same as the Product Accessory field, since it allows you to propose the products in your catalog as an accessory, except that this one sets your declinations flat, in order to allow your customers to order x quantity of each declination.
If you enter a minimum number of quantities, it is the quantity of the product for all variations combined that will be counted.
The field takes into account the discounts per quantity fixed for the product in question and its variations
note: combinations must have 2 attributes for this field to work.
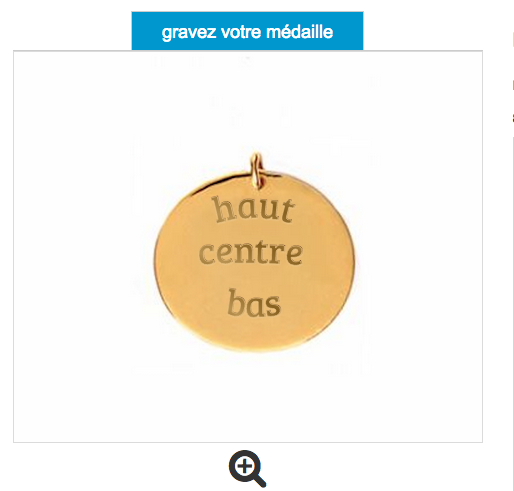
Custom font field :
This field will allow you to create your own typography, very useful if you sell engraved or sculpted letters (jewellery).
You will then have to create your alphabet in image and upload each image as a value by naming it with the associated letter.
Example value A => image of the letter A
Note: you can specify characters in capital letters or not
Example value A => image of the letter A
Example value a => image of the letter a
If you don’t want to differentiate between capitals, proceed as follows:
Example value A|a => image of the letter A
the separator | allows you to associate several characters to the same image.
A|a|à => image of the letter A
The Price table field:
this field allows you to load a csv file to calculate your rates according to 2 variables.
for example for dimensions (length/width)
once your file is loaded, add 2 values to the field, the first for the column and the second for the row
View field :
This field will allow you to create multiple customization views for your products.
For example, for a T-shirt, you will create the field « Side of the T-shirt » with the values « Face » and « Back ».
For each of these values, you will enter the corresponding image.
This is the first field to be created if you want to give your customers the ability to visually customize their products.
Indeed once this field is created, you will have the possibility to point your fields on a specific view.
For example, the visual will only be applicable on the face of the T-shirt, and the text only on the back.
By pointing to a view, you can also draw a rectangle on this view, delimiting the customization area.
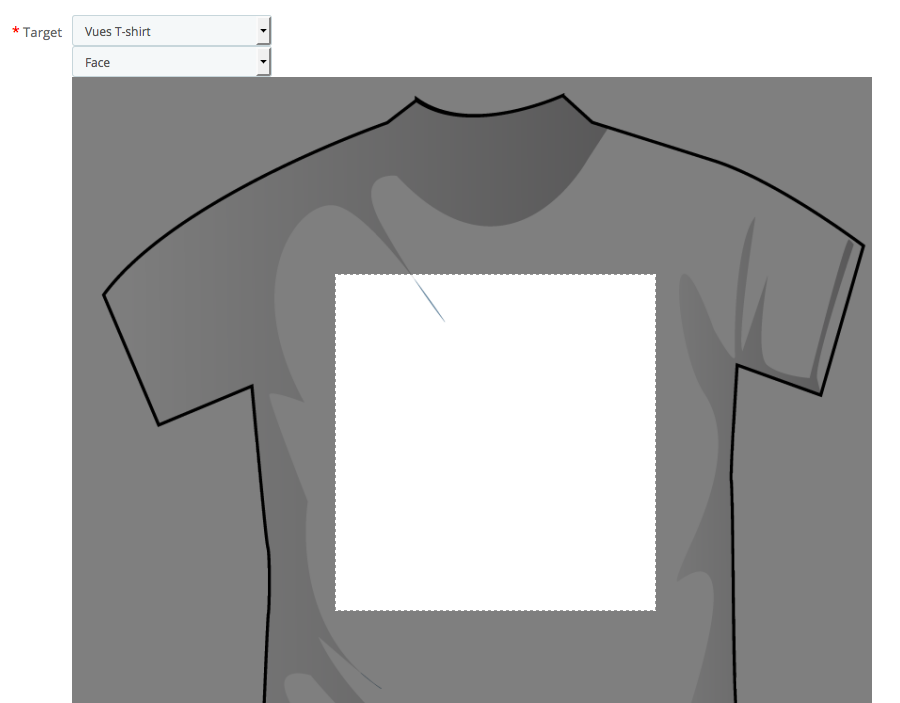
Note: For advanced users, you also have the ability to load an svg as a view. This can be useful to point a text field at a curve that has been drawn (in Illustrator® or inkscape® for example). The module will then propose you to point your text field on this view to select the curve. You will be able to manage several curves on the same view.
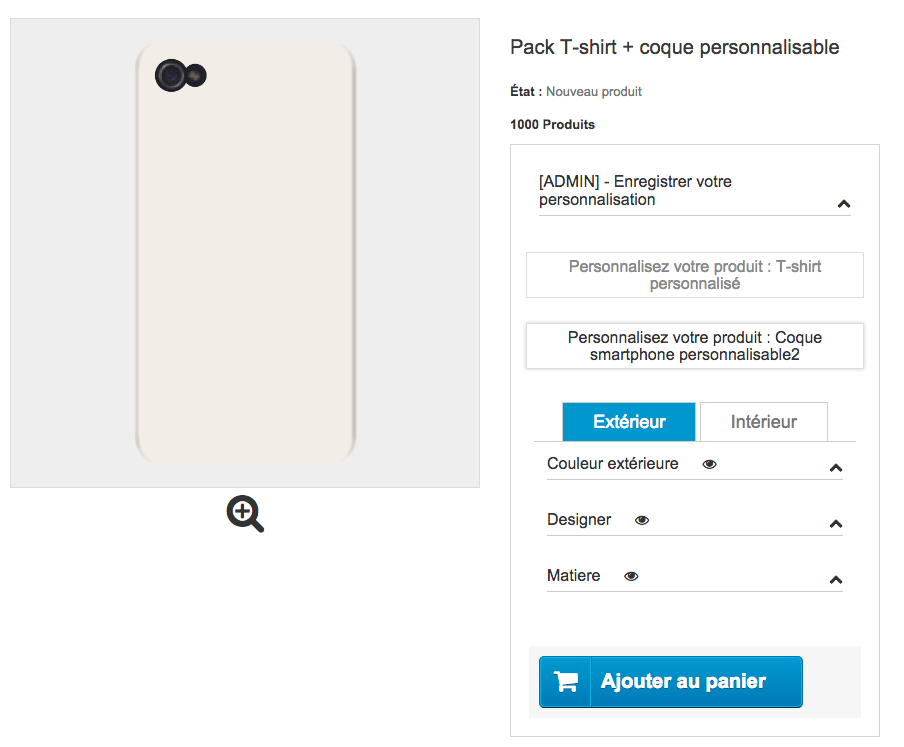
What about packs?
The packs are not to be outdone because they are customizable!
You can assign one or more fields to a pack in the same way as for a standard product.
Even stronger: if you create a pack containing already customizable products, the fields of all these products will be retrieved allowing your customers to customize these products within the framework of a pack!
The configurations:
The personalization module for Prestashop can save configurations made by your customers if you wish.
This can allow you several things:
- Find the customizations made by your customers to improve your service.
- Allow your customers to load old configurations in 1 click to improve their experience on your site.
- Allow your customers to save and name their configurations for easy retrieval.As administrator of the site, you will also be able to go to a front office product sheet and save one or more configuration on your different products.
So, you’ll be able to name these customizations that will be marked as admin customizations.
Admin customizations will then be offered to your customers, allowing you to guide them through the purchase process by loading your pre-defined configurations in 1 click.
Note: in admin you can associate an image with your pre-defined configurations.
You can also select if you want a default configuration that will be loaded automatically on arrival on the page. The price of this configuration will overload the price of the product in your product listing!
If you use this feature (default configuration) and your site is multilingual, you will need to create a language configuration (changing language to front office) so that each label is in the client language. In fact, the module associates a language with each configuration and offers your customers only the configurations that are in their language.
Field groups:
The module offers additional functionality to improve your administration work if you have a large amount of referrals.
With groups of fields, you will be able to gather several fields (previously created) and control them more quickly:
For example, you select 10 fields that can be applied to multiple products and associate them with your product lists and / or categories from a single page. By saving, all selected fields in the group are automatically assigned to the desired products.
Ndk advanced custom fields – T-shirt par ndkdesign
You can’t see module visible in front office
Please check that the module is good on the hook:
according to your version of Prestashop
Prestashop 1.7 => displayReassurance
Prestashop 1.6 => displayReassurance
If it does not appear, check also the presence of the hook in the code of your theme
note: this hook should not be inside a <form> </ form> tag, if in doubt consult the developer of your theme